A few weeks ago I posted a blog with a network design that can help you achieve better connectivity at your home. In this blog we will discuss the Installation and configuration of various devices use in that design.
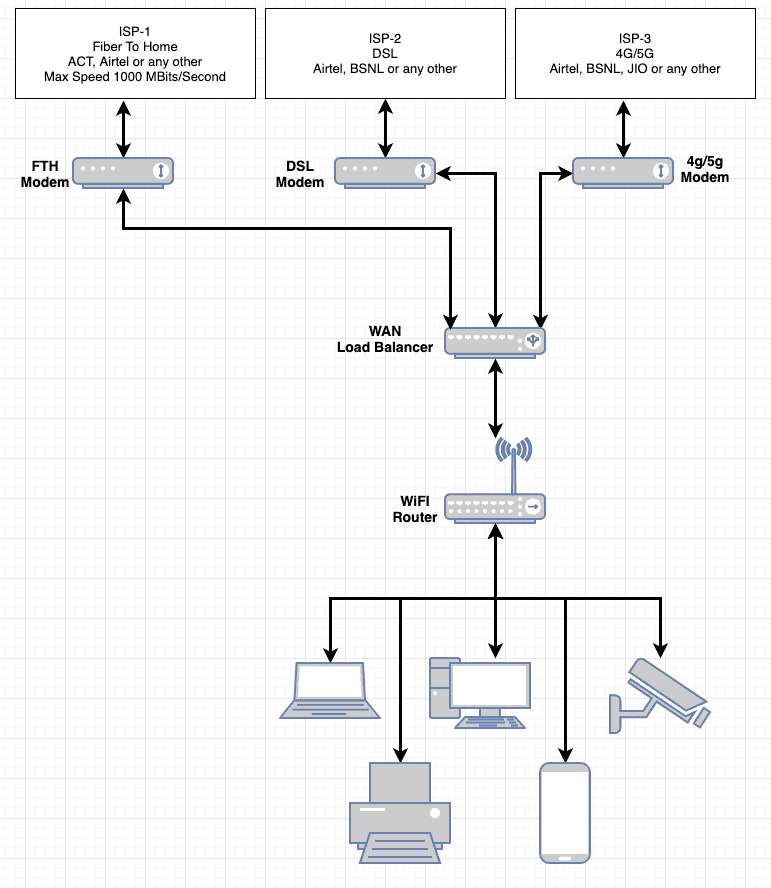
High Level Network Design
Installation and configuration
Step1: Reset all your devices to factory defaults
The devices can be reset to factory defaults using the reset button. The location of this button varies for device and vendor.
Make sure to keep a note of DSL and PPOE credentials before following this step
Step2: Find the default IPs
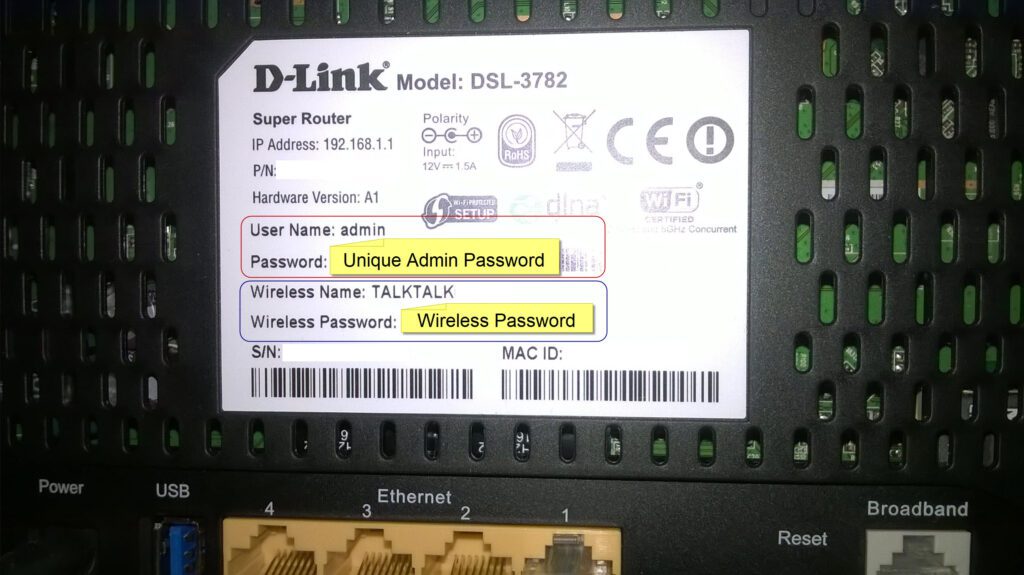
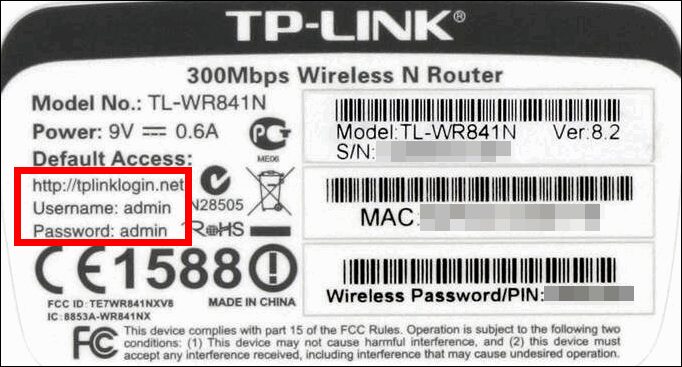
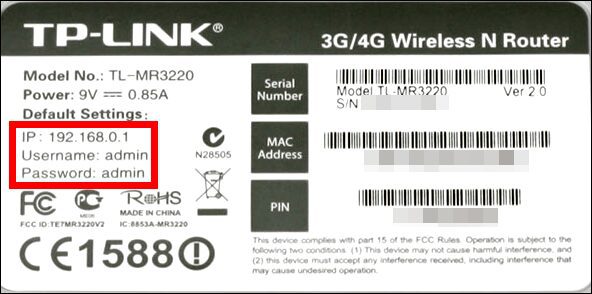
You can find the default IP of the device by reading the device label usually located behind the device. A few examples below
Some modern routers might have a url instead of an IP. Well in that case you will need to connect a PC/Laptop/Phone to that router and check the Default Gateway address getting assign to the PC/Laptop/Phone. Below are some useful KBs from various vendors. All the links below are using similar steps
- http://blog.dlink.com/finding-your-routers-ip-address-2/
- https://www.tp-link.com/us/support/faq/2392/
- https://www.linksys.com/us/support-article?articleNum=132891
Keep a note of the default IPs they will be used in later steps
Step3: Eliminate IP address conflict
The design uses 4/5 routers listed below
- FTH Modem (Presence subjected to ISP)
- DSL Modem
- 4g/5g Modem
- Wan Load Balancer
- WiFi Router
The devices in the above list come with a default IP address of 192.168.0.1 or 192.168.1.1. Therefore they can not be plugged in without making minor changes to there configuration.
Step3a: Decide an IP Scheme
Now that we know the default IPs for all our devices. It’s time to choose new IP Scheme. This will help us eliminate the IP address conflicts. Below is the IP address scheme used by my network
- FTH Modem:
- Not Present, my ISP (ACT) provides the last mile connectivity using Cat6/RJ45 cable
- DSL Modem:
- IP Address 192.168.3.1
- Subnet Mask 255.255.255.0
- DHCP Enabled
- WiFI disabled
- 4g/5g Modem:
- IP Address 192.168.2.1
- Subnet Mask 255.255.255.0
- DHCP Enabled
- WiFI disabled
- Wan Load Balancer:
- IP Address 192.168.0.1
- This device is using its default IP settings in my setup
- Subnet Mask 255.255.255.0
- DHCP Enabled
- IP Address 192.168.0.1
- WiFi Router:
- Set to Access Point mode
- No IP configuration needed
Step4: Reconfigure the devices
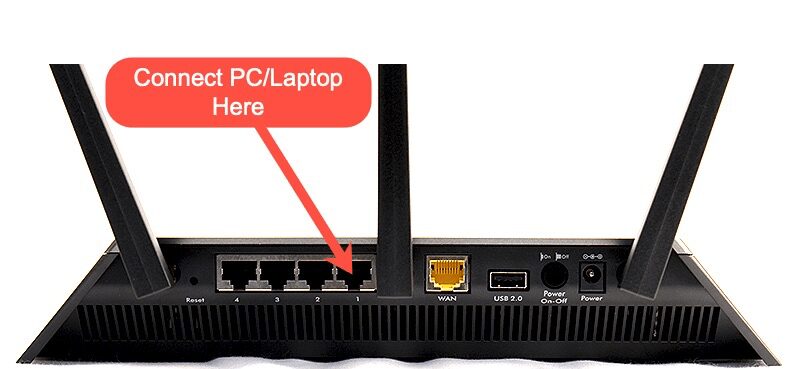
DSL Modem:
- Connect a PC/Laptop to your DSL Modem LAN Port
- Follow the steps in the Video
4g/5g Modem:

- Follow the steps in the Video
Wan Load Balancer:
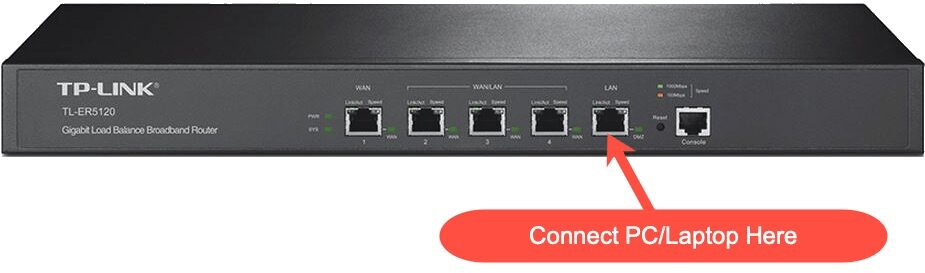
- Follow the steps in the Video
WiFi Router:
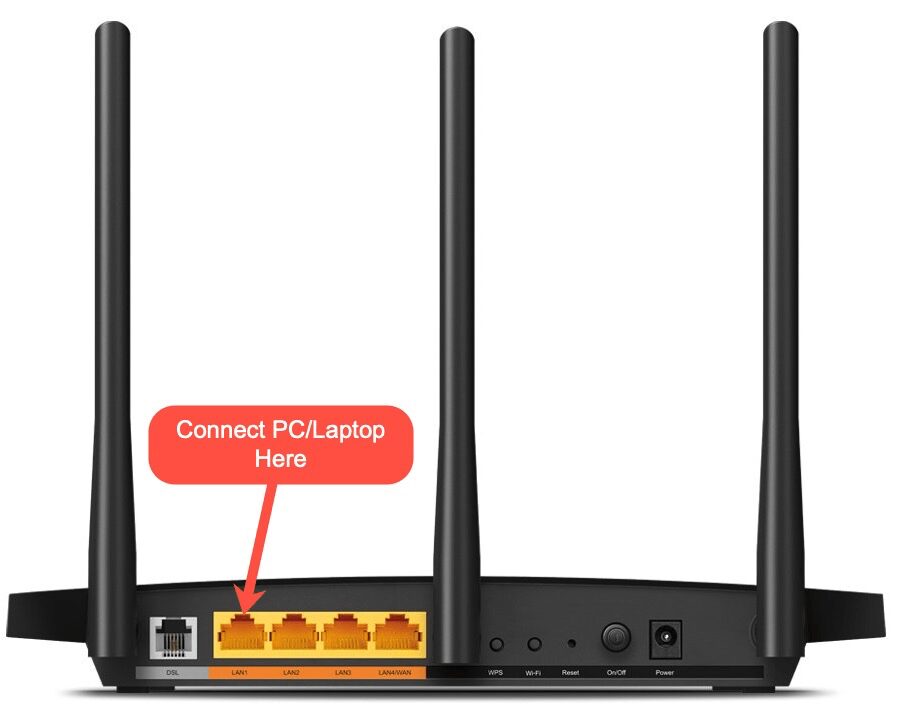
- Connect a PC/Laptop to your WiFi Router LAN Port
The design can also be achieved using WiFi router that does not support Access Point Mode. Feel free to ask for help in comments in case you need those details.
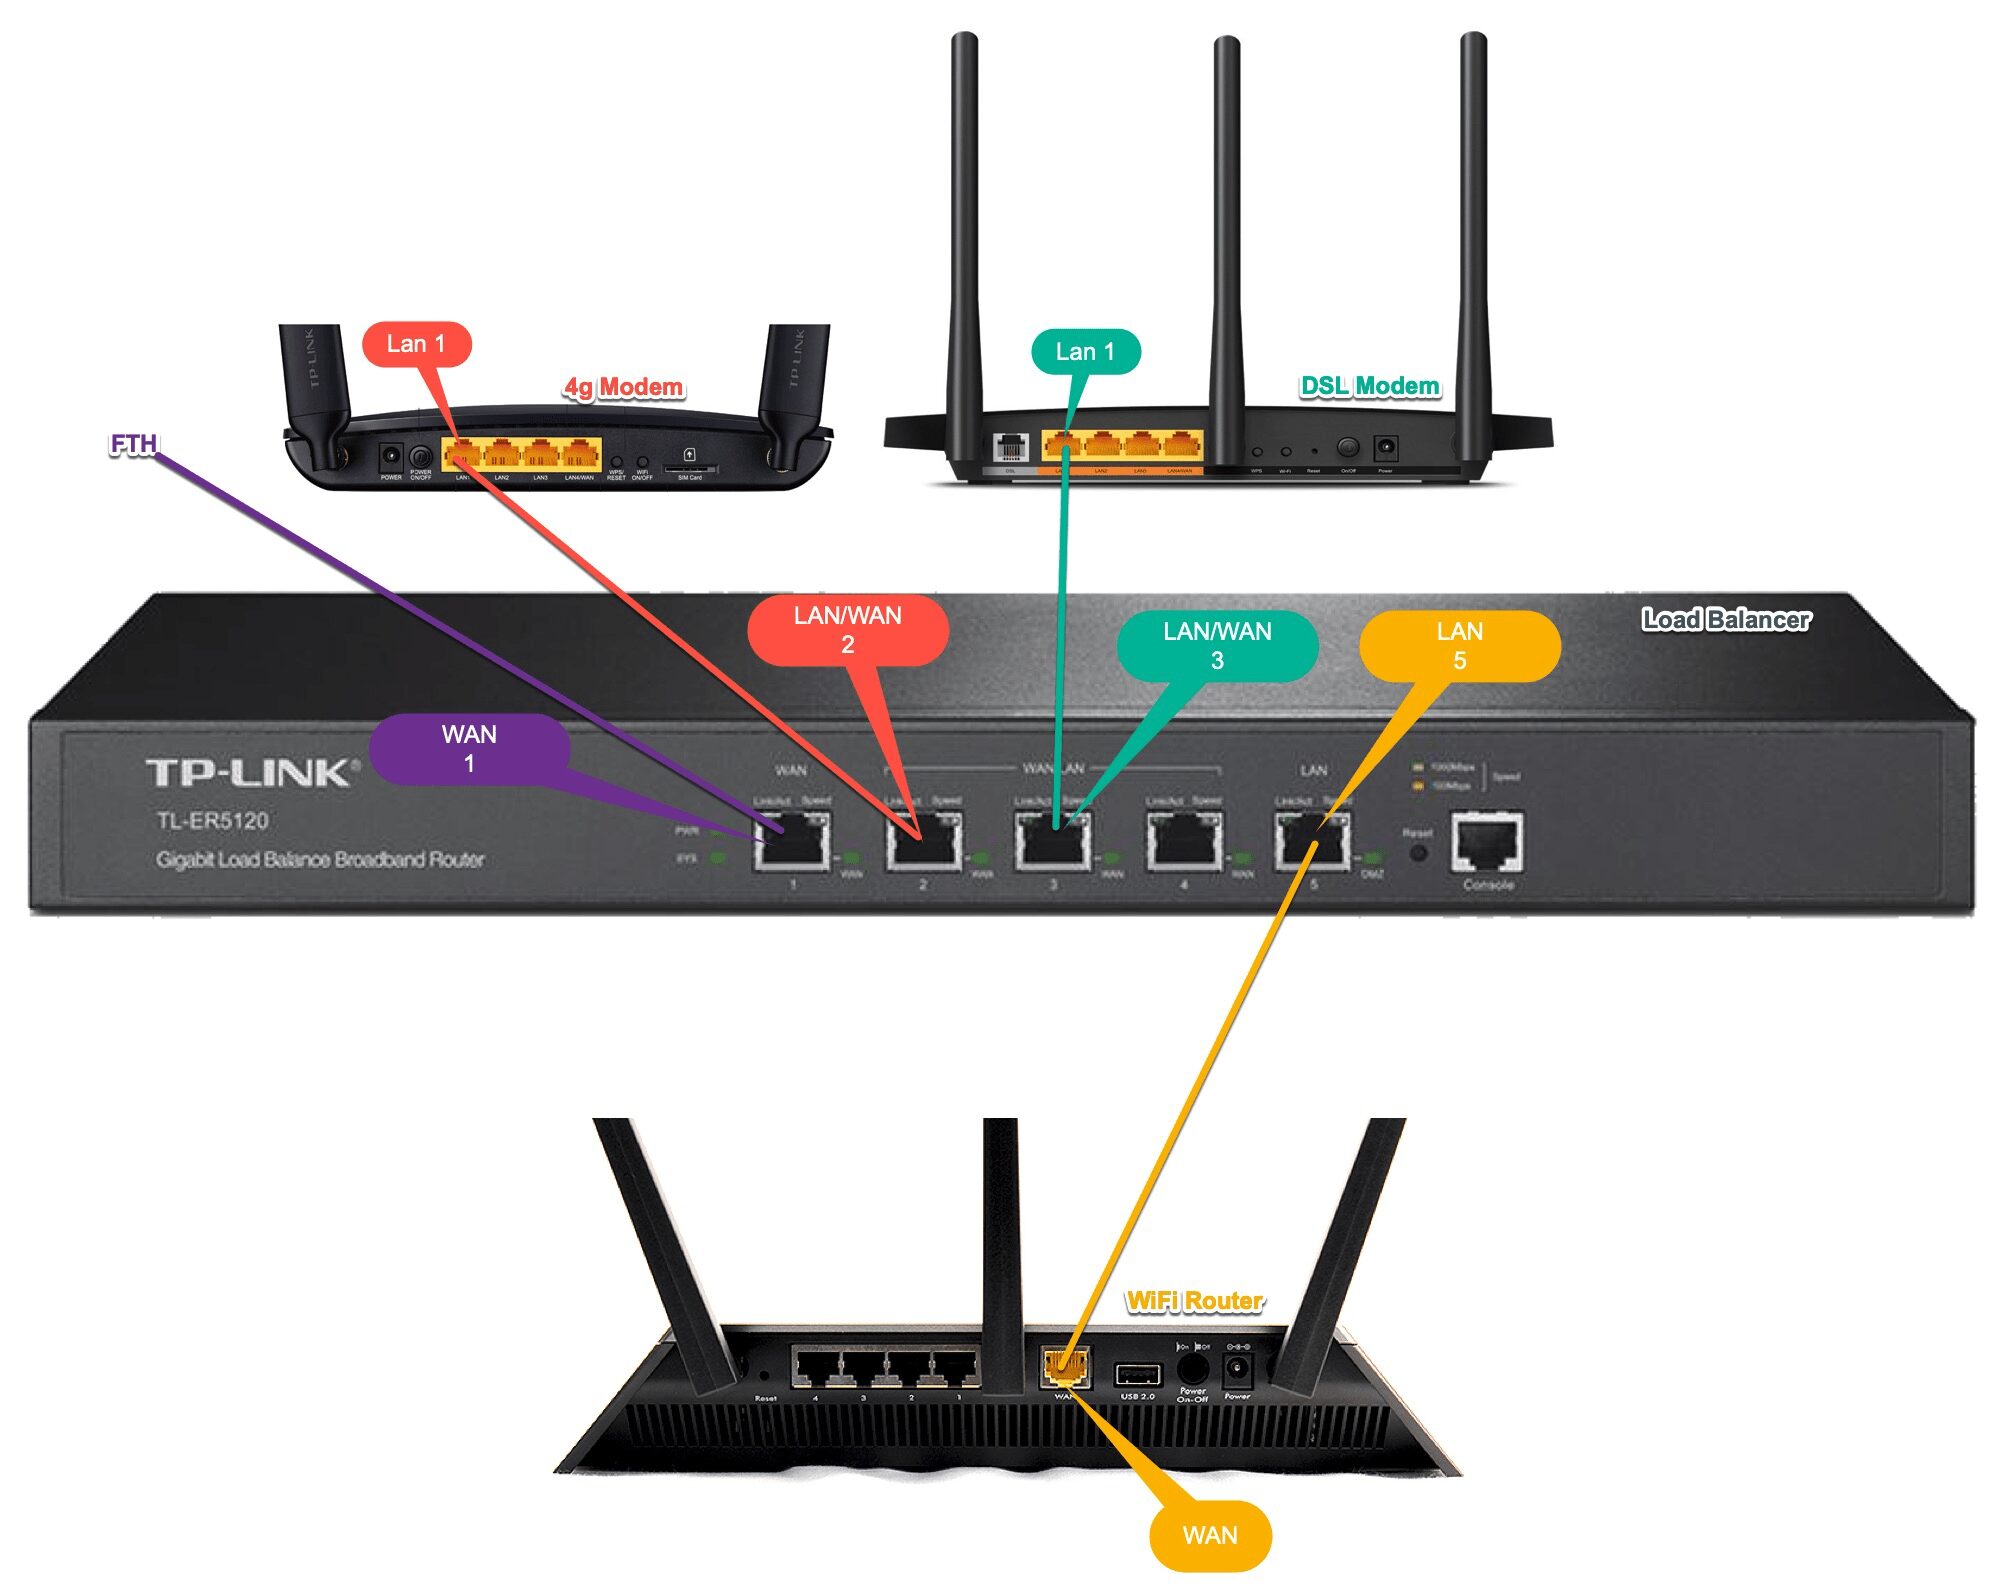
Step5: Connecting the routers together
We are now ready to hook the devices together.
Congratulation, you are done. No more hassle of manually switching between the networks.
Just a few security tips,
– Remember to change the default credentials for all the devices, Unless you are happy to share your network with the girl/guy next door 😉 and Hackers
– Remember to disable Wifi on your DSL and 4g/5g Modem
– Remember to change the default Wifi credentials
Happy Work From Home
just the article I was waiting for… thank you for the detailed steps Akshay Sir…time to implement 🙂
between one suggestion as the ER5120 is now EOL, which one will be a good bet: L-R480T+(V5) or TL-R605?
TL-R605, If aggregated speed of all the Internet connections is above 100 mbps.